 |
| Mmm, hot and dangerous! |
From here, I took the lamp to something like this:
I am still working on figuring out how to better connect/unite/unify/transform the individual stems of the lamp heads. Any ideas out there??
In the meantime, I gave you a preview last week that I have finished fancying up the lampshade. So, I am here today to show you the how-to of that accomplishment.
I started out with a curtain valence that I bought on sale at Wal-Mart. It is a champagne-gold sateen fabric which is layered in tiers.
I had to do a little maneuvering/trial-and-error testing before figuring out how I was going to attach the curtain to my lampshade. Here is a picture of of the curtain simply clipped to the shade. Notice [1] it wraps about one-and-one-fourth ways around the circumference, and [2] it is twice as long as the shade's height.
To remedy the circumference issue, I took some spare fabric and laced it through the space where a curtain rod normally would be inserted.
Then I used my hot glue gun to pucker the upper ruffle of the curtain. If had not done this, the upper ruffle would have laid limply. That would have been gross.
 |
| Sorry, this apparently is the only picture I took during the hot gluing process! |
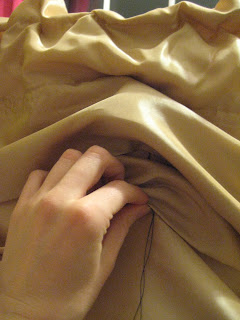
After letting the glue set, I set to address the problem with the length. What first drew me to the curtain was the tier design. With the idea of a wedding dress bustle in my mind, I decided I would try to "bustle" the tiers using needle and thread. Here is a panned out picture of my work station, aka my desk.
At first I was simply sewing the fabric to itself:
but that quickly proved itself not to work as the weight of the fabric resulted in a sagging effect, where I was going more for a light-weight look.
In, out, and repeat!
To fix this, I changed my method to sewing the curtain layers right into the lampshade. By tethering the fabric right into the shade, the fabric no longer weighed itself down. Since the curtain had four tiers of fabric, the lampshade has four layers of bustle. I attached the fabric with two to three stitches per point--just enough to securely attach the fabric without leaving a bulk of thread to conceal later. If I had really planned out my attack, I probably would have measured out and marked the lines and points of attachment. Maybe I will do that next time. This time I just eye-balled it.
After a little primping and fluffing, I officially declared the lampshade a successful finish!
What do you think? Any ideas on how I can best finish off the lamp's base? I could use your helpful suggestions!


MK, this looks absolutely adorable. I think that you could make several more of these, possibly in the same color and then in other colors, and sell them somewhere. You could put them on display at an art fair somewhere and sell some. Some color suggestions are black, deep navy blue, that modern pear green color, and silver.
ReplyDeleteI was thinking that for the base you could take strands of beads and gems that match the curtain and tightly wrap them around all of the showing silver parts of the whole base. Just an idea :D
Love you, #6